How to Change DNS on Namecheap (Step-by-Step Guide)
🔹 Step 1: Log in to Your Namecheap Account
-
Click Sign In at the top right
-
Enter your username and password
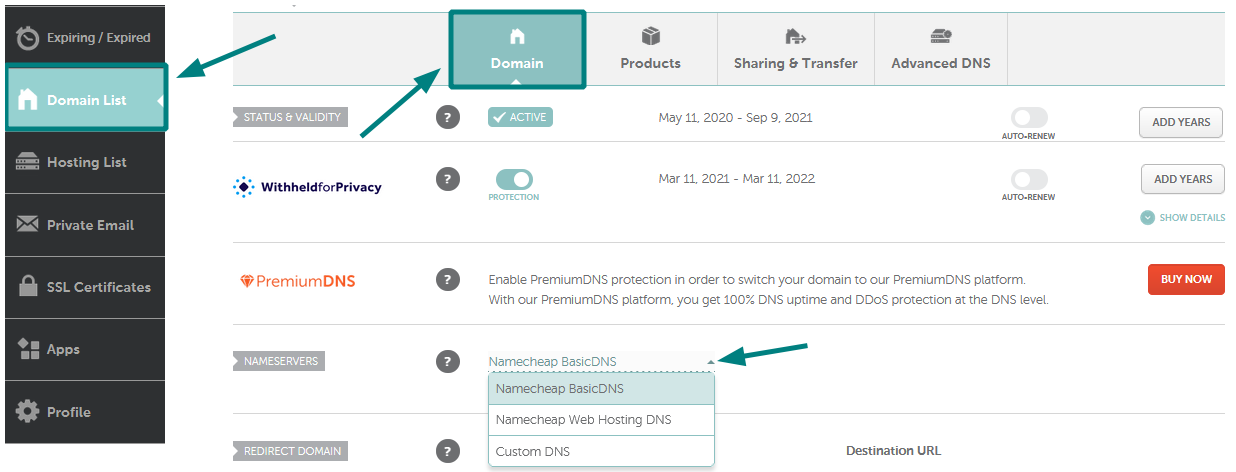
🔹 Step 2: Access Domain List
-
After logging in, go to the Dashboard
-
Click on Domain List from the left sidebar
-
Find the domain you want to update
-
Click the Manage button next to it
🔹 Step 3: Change Nameservers (DNS)
-
In the Domain tab, locate the Nameservers section
-
Click the dropdown menu
-
Choose one of the following options:
-
Namecheap BasicDNS → Default DNS by Namecheap
-
Namecheap Web Hosting DNS → If using Namecheap hosting
-
Custom DNS → If using third-party DNS (e.g., Cloudflare)
-
If you select Custom DNS, enter your nameservers (for example):
-
ns1.example.com -
ns2.example.com
-
👉 If you're looking for a reliable SMM platform or hosting-related services, you can also check out: https://vnsmm.net
🔹 Step 4: Save Changes
-
Click the ✔ Save (checkmark icon)
-
Wait for confirmation
🔹 Step 5: Wait for DNS Propagation
-
DNS changes may take up to 24–48 hours to fully propagate worldwide
-
In many cases, changes apply within a few minutes to a few hours
🔹 Tips
-
Make sure you enter the correct nameservers provided by your hosting or DNS provider
-
If using Cloudflare, ensure your domain is added to Cloudflare before switching DNS
-
You can verify DNS changes using tools like
nslookup,dig, or online DNS checkers
🔹 Example Use Case
If you want to point your domain to Cloudflare:
-
Add your domain to Cloudflare
-
Get the assigned nameservers
-
Paste them into Namecheap under Custom DNS
-
Save and wait for propagation
✅ Done!
Your DNS has now been updated successfully.
If you need help configuring A records, CNAME, or SSL after this step, feel free to ask.